As an Amazon Associate, we earn from qualifying purchases. Some links on this site are affiliate links at no extra cost to you. Our recommendations are based on thorough research and editorial judgment.

How To Make Nut Milk At Home?
Making nut milk at home is a fun and tasty adventure! First, we choose our nuts, like almonds or cashews, for their creamy texture. We soak them for ideal blending—8-12 hours for harder nuts does the trick. After soaking, we blend the nuts with water, adding fun flavors like cinnamon if we want. Straining through a fine mesh bag gives us smooth milk, and we can store it in an airtight container. Stick around to discover more tips and tricks!
Key Takeaways
- Soak chosen nuts (almonds, cashews, or macadamia nuts) for 4-12 hours, ensuring proper hydration.
- Blend soaked nuts with water at a ratio of 1 part nuts to 3-5 parts water for desired thickness.
- Use a high mesh nut milk bag to strain the blended mixture, separating the nut milk from the pulp.
- Store the nut milk in airtight containers in the fridge and consume within 2-5 days for freshness.
- Shake the nut milk before use, as separation is normal due to lack of stabilizers.
Choosing the Right Nuts
You may be interested


When it comes to choosing the right nuts for our homemade nut milk, we’ve got a delightful variety to contemplate—like a nutty buffet waiting for us! Almonds and cashews are our go-to nut varieties, thanks to their mild flavor profiles and creamy textures. They’re perfect for mornings or cozy evenings. If we’re feeling a little adventurous, how about macadamia for that rich, buttery taste? It’s a tad pricey but so worth it! Brazil nuts lend a thicker consistency and a unique flavor that’s great in savory dishes. Remember, picking raw, unsalted nuts means no off-flavors in our milk. Additionally, using a quality nutcracker tool can make the shelling process easier and more efficient. Let’s experiment a bit and find what nut delights our taste buds the most! Who knew nut shopping could be so much fun?
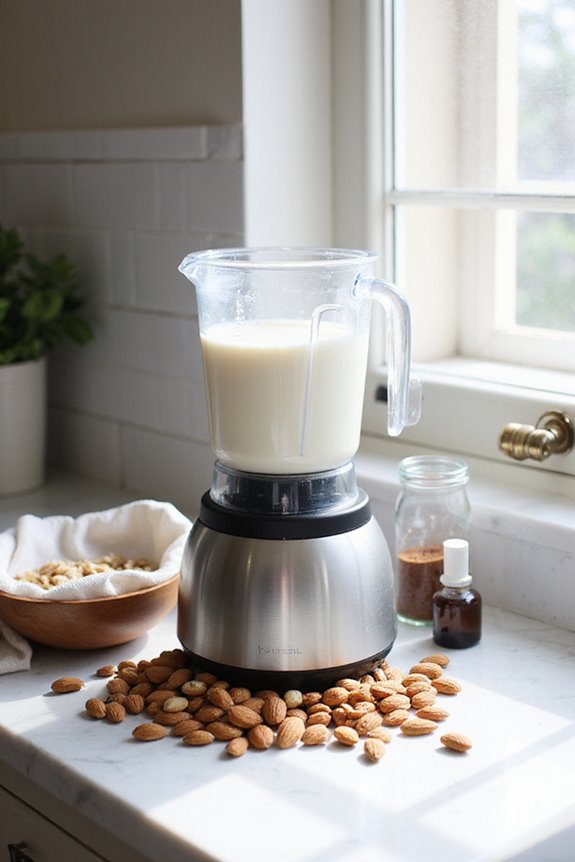
Soaking Nuts for Optimal Blending
Soaking our chosen nuts isn’t just a simple step—it’s the secret sauce to achieving that creamy, dreamy nut milk we all crave. By following ideal soaking times, like 8 to 12 hours for harder nuts such as almonds and walnuts, or just 4 hours for softer nuts like cashews, we guarantee a smooth blend. Using a water ratio of about 4 cups for every cup of nuts helps them hydrate properly, improving texture and flavor. Oh, and let’s not forget cleaning our nuts; rinsing them removes those pesky enzyme inhibitors! Cold soaking not only prevents spoilage but also enhances that creamy texture we love. Trust us, soaking comes with heaps of benefits for your homemade nut milk! Additionally, using micro-porous structures in nut milk production can help improve the overall texture and flavor.
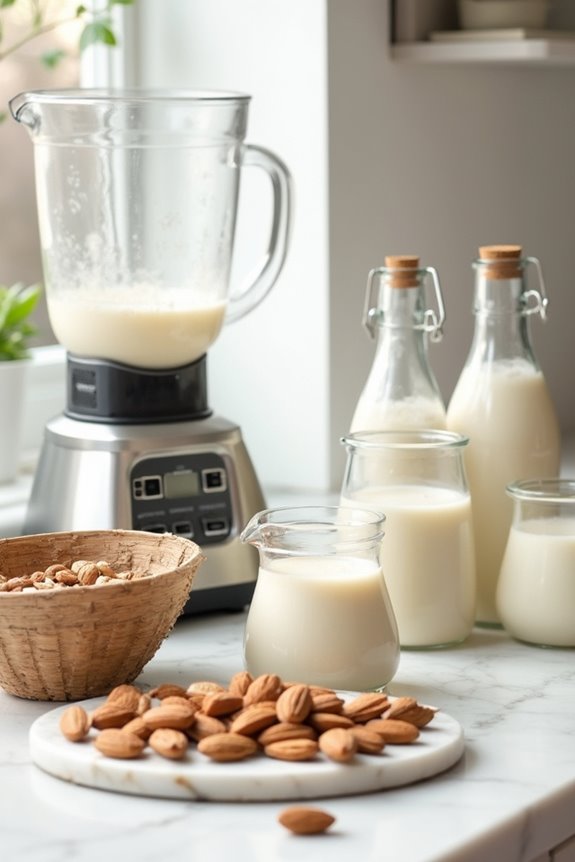
The Blending Process
Getting that creamy nut milk just right involves a few essential steps during the blending process. First, we’ll want to soak and rinse our nuts before tossing them in a high-speed blender. Using the right blending techniques, we’ll add around 1 part nuts to 3 to 5 parts water, adjusting based on how thick we like our milk. Typically, blending durations range from 1 to 4 minutes—aim for 1 minute for frothy goodness and 2 to 3 for a thicker result. Keep an eye on the texture, and avoid overheating it by blending continuously. If we want to add flavor, let’s toss in some dates or cinnamon during blending for that perfect touch. Remember to use a high mesh count nut milk bag for the best filtering results. Happy blending, friends!
Straining and Filtering Nut Milk
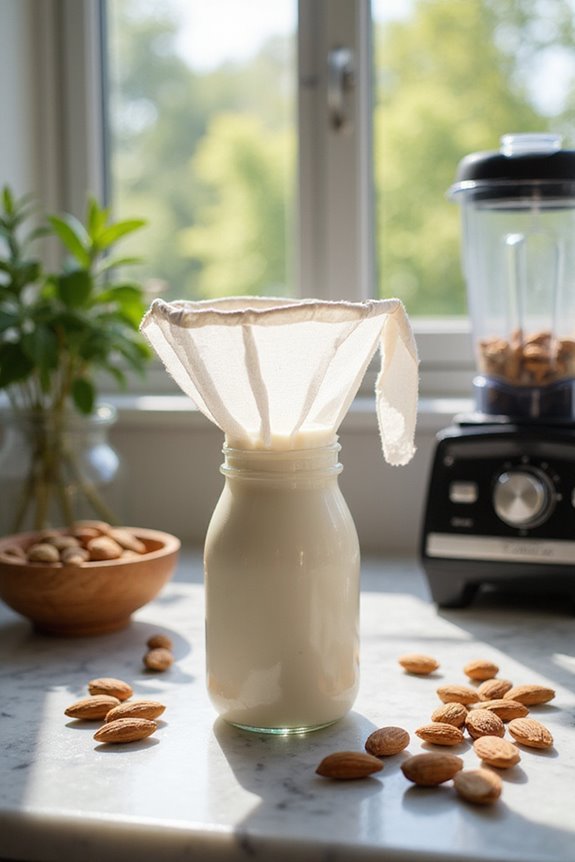
Straining and filtering nut milk might just be the most satisfying part of the entire process, and it’s where the magic truly happens! When we pour our blended mix into a fine-mesh nut milk bag over a large bowl, excitement builds. We gently squeeze, using our straining techniques to separate every drop of creamy goodness from the pesky pulp. A nylon nut milk bag works best, preventing solids from sticking like an old friend! Or, we can improvise with cheesecloth if needed. Who knew a coffee press could also lend a hand for certain nuts? Our efforts reward us with silky smooth nut milk, ready to elevate our recipes. Interestingly, using high-quality materials for straining tools can enhance the overall efficiency of this process. Let’s cherish this simple yet delightful step together!
Storage Tips and Shelf Life
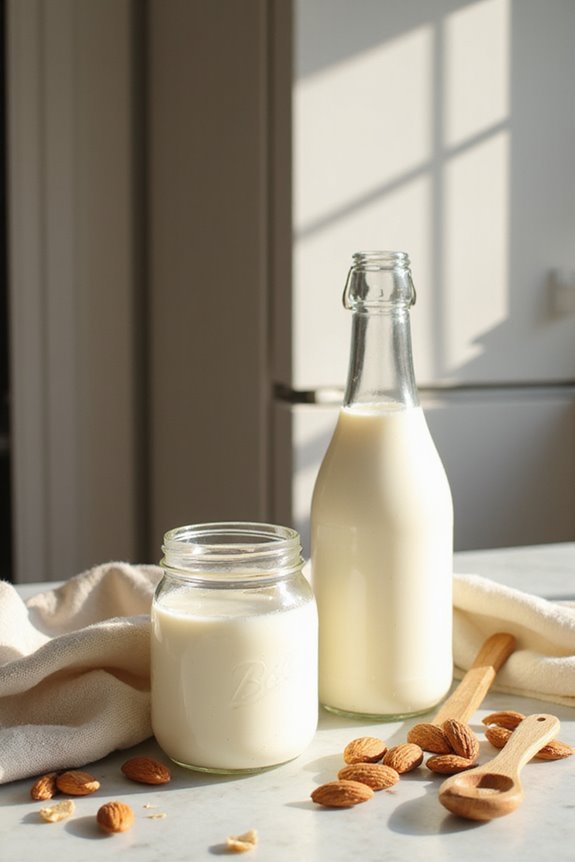
Once we’ve strained and filtered our creamy nut milk, it’s time to think about how to keep it fresh and tasty for as long as possible. For proper nut milk storage, we should keep it in airtight containers at or below 40°F (4°C) to prevent pesky bacteria from spoiling our creation. It’s best to consume it within 2 to 5 days. If we need more time, we can freeze it! Nut milk lasts about 3 to 6 months in the freezer. Just remember to label those containers with dates for easy tracking. And don’t panic if it separates; a good shake or blend before using will bring it back. Additionally, using airtight containers ensures maximum freshness and prevents spoilage. Let’s savor every drop!
Flavor Variations and Add-Ins
When it comes to crafting delicious nut milk, flavor variations and add-ins can take your homemade beverage to the next level. We love exploring flavor enhancements like vanilla extract or natural sweeteners such as dates and maple syrup to achieve that perfect sweetness. Spice combinations, including cinnamon or nutmeg, can warm things up, while turmeric adds a colorful twist!
Don’t shy away from fruit additions, either—fresh berries add a lovely aroma, while bananas create creamy textures. For a seasonal flair, consider using spices like cardamom or even raw cocoa for a chocolatey treat. Remember to experiment with nut pairings; almond with strawberries and cashew with coconut butter can elevate your nut milk experience. So let’s get blending!
Equipment Needed for Nut Milk
If you’ve ever thought about making nut milk at home, one of the most exciting parts is gathering all the right equipment! We’ll want a high-speed blender, like a Vitamix or Blendtec, for that smooth, creamy texture we crave. But hey, if we don’t have one of those, bullet blenders can work too—just keep in mind their limitations. A fine mesh nut milk bag is essential for separating the pulp from the liquid; it makes all the difference! For those of us feeling a bit fancy, specialized nut milk makers automate the process beautifully. Don’t forget glass jars for soaking and storing—we want to keep things fresh! Happy blending!
Tips for Successful Nut Milk Making
Gathering the right equipment sets us up for success, but it’s the little details in the process that really make our nut milk shine. Choosing the right nut varieties is essential—almonds, cashews, or walnuts each bring unique flavors. Let’s remember that soaking duration matters too; soaking for 12-48 hours gives us that creamy texture we love. We should use a helpful ratio of 1 cup of soaked nuts to 4 cups of filtered water for the perfect blend. And don’t overspend time blending—60 to 90 seconds is usually enough. When we strain, let’s squeeze the nut bag thoroughly to maximize milk yield. Trust me, these small steps make a world of difference in our homemade nut milk!
Creative Uses for Nut Pulp
Although nut pulp might seem like an afterthought once we’ve enjoyed our creamy nut milk, this byproduct is a treasure waiting to be transformed. Let’s explore some fun nut pulp recipes together! We can dry it in the oven to create almond meal for baking—perfect for cakes and cookies. Or how about adding it to cookie dough for chewy interiors? Nut pulp benefits our health, too, adding fiber and protein to snacks like energy balls and bliss balls. We might even whip up savory crackers or vegan burger patties with it! Don’t toss it—embrace the creativity! Plus, our eco-friendly choice reduces waste. Let’s enjoy deliciously nutritious food while being kind to our planet.
Frequently Asked Questions
Can I Use Roasted Nuts for Making Nut Milk?
Absolutely, we can use roasted nuts for nut milk! They offer flavor enhancement, giving our milk a deeper, richer taste. Plus, the creamy texture makes our homemade beverages even more delicious. Let’s try it!
What Is the Nutritional Difference Between Various Nut Milks?
When we’re exploring nut milks, almond milk benefits include low calories and heart-healthy fats, while hazelnut milk nutrition offers a moderate protein boost. It’s fascinating how these options cater to different dietary needs, isn’t it?
How Do I Know if My Nut Milk Has Gone Bad?
If we notice a sour smell or visual changes like clumps or mold, it’s time to say goodbye to our nut milk. Trust our senses; they’ll guide us to keep our taste buds safe.
Can Nut Milk Be Used in Coffee or Tea?
Absolutely, we love using nut milk in our coffee or tea! Its nutty flavor really enhances our drinks, making delicious coffee alternatives. Just remember to experiment with different types to find our perfect match!
Is Nut Milk Suitable for Those With Nut Allergies?
Nut milk isn’t suitable for those with nut allergies, as it can trigger allergy symptoms. Instead, we recommend exploring nut milk alternatives like oat or rice milk for a safer, delicious option.